Zer0Note User Guide
          Welcome to
 ______    _ _ _                  _ _ _   _    _            _
|      |  |_ _  |   _ _    _  _  |  _  | |  \ | |   _ _   _| |_    _ _
| 0 u 0|    /  /  /  _  \ | |/_\ | | | | |   \| |  /   \ |_   _| /   _ \
|      |   /  /_  |  _ _/ | |    | |_| | |  |\  | |  [] |  | |_  |  _ _/
|______|  |_ _ _|  \ _ _| |_|    |_ _ _| | _| \_|  \ _ /   |_ _|  \ _ _|
Table of Contents
1. Introduction
1.1. How to use this guide
1.1.1. Icons and their meanings
1.1.2. Notes about the format
2. Quick Start
3. Features
3.1. Viewing the user guide: help
3.2. Switching between the two modes: mode
3.2.1. Switching to the notebook mode
3.2.2. Switching to the timetable mode
3.3. Personalised Messages
3.4. Timetable Mode
3.4.1. Adding a task: add
3.4.2. Marking a task as done: done
3.4.3. Tagging a task: tag
3.4.4. Listing tasks: list
3.4.4.1. Listing all tasks
3.4.4.2. Listing done tasks
3.4.4.3. Listing undone tasks
3.4.4.4. Listing urgent tasks
3.4.5. Finding tasks: find
3.4.5.1. Finding by keyword
3.4.5.2. Finding by tag
3.4.6. Deleting a task: delete
3.5. Notebook Mode
3.5.1. Adding a notebook/section/page: add
3.5.1.1. Adding a notebook
3.5.1.2. Adding a section
3.5.1.3. Adding a page
3.5.2. Selecting a notebook/section/page: select
3.5.3. Tagging a notebook/section/page: tag
3.5.4. Listing contents: list
3.5.5. Finding contents: find
3.5.5.1. Finding by keyword
3.5.5.2. Finding by tag
3.5.6. Deleting a notebook/section/page: delete
3.6. Exiting the program: exit
4. FAQ
5. Command Summary
6. For advanced users: Editing your save file
6.1. The tasks save file
6.2. The notebooks save file
1. Introduction
Welcome, and thank you for choosing Zer0Note!
Zer0Note is a note taking and organisation application meant for students (especially those who can type fast). It combines the features of note-taking apps (like OneNote) with the interaction speed of command-line based tools like vim and emacs. It helps students (like yourself!) to keep track of deadlines and take notes quickly.
Zer0Note is designed for students who love typing, and the command line!
This document contains all the information you need to get started with using Zer0Note. It contains an exhaustive guide to all the features in the application. A condensed version of this guide is available inside the application too, for quick reference while you’re using Zer0Note. To learn how to access the built-in user guide, see Section 3.1.
1.1. How to use this guide
This user guide will give you a step-by-step tutorial on how to use each of the commands. By using these commands, you will be able to keep track of your deadlines and organise your notes!
1.1.1. Icons and their meanings
Here are some icons that will be used in this User Guide:
Table 1: Icons and their meanings
| Icon | Meaning |
|---|---|
| This is a note. A note suggests some considerations when using Zer0Note. | |
| This is a tip. A tip gives you a suggestion when using Zer0Note. | |
| This is a warning. A warning suggests that you may get an error. |
1.1.2. Notes about the format
- Words/sections that look like this:
example, are code snippets. - Words/phrases within
[square brackets]are the expected user inputs. e.g. inadd /n[NOTEBOOK],NOTEBOOKis a parameter which can be used asadd /nCS2101 - Words within
(parentheses)are optional user inputs. e.g. inlist (/urgent),/urgentis an optional parameter. - Words in blue are clickable links.
- Within a code segment, the symbols before the
$symbol indicate the current address that the user is in. The following symbols represent the current address:-
T:$- The user is in TimeTable mode. -
N:$- The user is in Notebook mode. -
N/[NOTEBOOK NAME]:$- The user is in Notebook mode, and is in the indicated notebook with ‘NOTEBOOK NAME’. -
N/[NOTEBOOK NAME]/[SECTION NAME]:$- The user is in Notebook mode, and is in the indicated section with ‘SECTION NAME’ of the notebook with ‘NOTEBOOK NAME’. -
N/[NOTEBOOK NAME]/[SECTION NAME]/[PAGE NAME]:$- The user is in Notebook mode, and is in the indicated page withPAGE NAME, of the section with ‘SECTION NAME’, of the notebook with ‘NOTEBOOK NAME’.
-
Example:
N:$ select /sChapter 1
-------------------------------------------------------------
now in notebook section: Chapter 1
-------------------------------------------------------------
-
select /sChapter 1is the user’s input, andnow in notebook section: Chapter 1is the output message. -
When any of the titles in the current address is longer than 10 characters, a
...symbol will be printed after the first 7, to represent the remaining characters.
Example:
N/noteboo...:$
- where
N/indicates that the user is in Notebook Mode andnoteboo...is the name of the Notebook, which has more than 7 characters.
2. Quick Start
Here is a list of instructions on how you can run Zer0Note!
- Ensure that you have Java 11 or above installed. You may use the Oracle Java SE runtime or an open-source alternative like AdoptOpenJDK.
- Download the latest version of
Zer0Notefrom here. - Copy the file to the folder you want to use as the home folder for Zer0Note.
-
Open a terminal on your computer and navigate to the folder containing the jar file. In the following example, the file has been saved in the Downloads folder.

Figure 1. Changing directory in Windows command prompt
- Type
chcp 65001and press Enter. - Type
java -jar Zer0Note.jarand press Enter. -
If successful, you will see the following message.
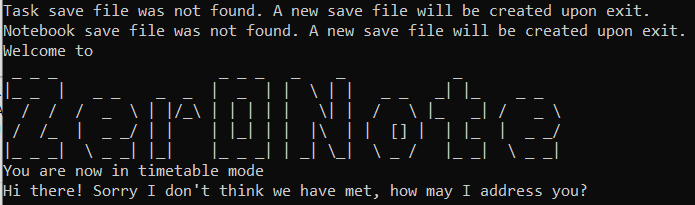
Figure 2. Welcome message on successful run
Great! Now that you have successfully run Zer0Note, go ahead and try out the different commands available (shown in section 3. Features).
3. Features
This section introduces the available features, and the format required for each of the commands.
Zer0Note can operate in two different modes:
- Timetable Mode
- Notebook Mode
The following sections will explain more about the different commands that can be used anywhere, and commands specific to Timetable Mode and Notebook Mode.
3.1. Viewing the user guide: help
Whenever you need help, you can view the full built-in user guide by typing in help.
To view the user guide for the timetable mode, type in help timetable.
To view the user guide for the notebook mode, type in help notebook.
3.2. Switching between the two modes: mode
This command allows you to switch from notebook mode (at the bookshelf level) to the timetable mode, or vice versa.
3.2.1. Switching to the notebook mode
Format: mode /n
Example of usage:
T:$ mode /n
-------------------------------------------------------------
You are now in notebook mode
-------------------------------------------------------------
3.2.2. Switching to the timetable mode
Format: mode /t
Example of usage:
N:$ mode /t
-------------------------------------------------------------
You are now in timetable mode
-------------------------------------------------------------
Entering an invalid mode, such as /d, will give you an error
3.3. Personalised Messages
We have included personalised messages to compliment your works!
A personalised message will be printed out to you in the command line interface whenever you enter a particular command. Personalised messages will include a random generated encouraging message followed by the name provided by you upon the launch of Zer0Note.
Example of how a personalised message will look like:
I like how you think, Tom.
Commands that include personalised messages are:
adddonelistdeletetagfind
Example of usage:
T:$ add /tRead book /by19-10-2020 1800
-------------------------------------------------------------
Added: Read Book
1:[x] Read book (by: Oct 19 2020 06.00 PM)
-------------------------------------------------------------
{personalised message}
-------------------------------------------------------------
{personalised message} is a placeholder for the various personalised message that a user will receive.
3.4. Timetable Mode
Keeping up with deadlines may seem like a daunting task, especially when you’re already busy with school.
With Zer0Note’s Timetable Mode, you’ll be able to manage a list of tasks.
You can add, delete, list and mark your deadlines as done!
For example, you can add your assignments with their due dates as tasks. You can then mark them as done when you’re finished with them, or delete them if you’ve made a mistake.
The following sections explain the various features you can use while you are in the Timetable Mode.
3.4.1. Adding a task: add
This command lets you add a task with a deadline to the task list.
Format: add /t[TASK] /by[dd-MM-yyyy] [hhmm]
These are the parameters required in the command:
-
TASK: name of the task. -
dd-MM-yyyy: the due date of the task, in the format day-month-year. -
hhmm: time the task is due, in 24h format.
Example of usage:
Let’s say you have to read a book for one of your modules.
T:$ add /tRead book /by19-10-2020 1800
-------------------------------------------------------------
Added: Read Book
1:[x] Read book (by: Oct 19 2020 06.00 PM)
-------------------------------------------------------------
With that, you’ve successfully added a task titled Read book, with the deadline Oct 19 2020 06.00 PM into your task list!
3.4.2. Marking a task as done: done
Marks an existing task as done in the current task list.
Format: done [INDEX]
This is the parameter required in the command:
-
INDEX: Index of the existing task in the current task list.
Example of usage:
T:$ done 1
-------------------------------------------------------------
Yay! I've marked this task as done:
 [o] Read book
-------------------------------------------------------------
3.4.3. Tagging tasks: tag
You have added a few tasks, and completed some of them. Congratulations! After reviewing, you realise that some of the tasks come from the same module, or that some are non-academic-related. Is there any way you can categorise them together?
This command lets you add a single tag to an existing task to remind you of the category it belongs to. You can
learn how to search for all tasks with the same tag in Finding tasks by tag.
Each task can only have one tag. The previous tag will be automatically overwritten by the new tag and no reminder will be given.
Format: tag [INDEX] /t[TAG]
These are the parameters required in the command:
-
INDEX: index number of the intended task in the full task list -
TAG: text description of the tag
Example of usage:
For example, if you want to tag the first task in the list as “Todo”, after T:$ in the command window, type “tag 1 /tTodo”.
Below shows the expected output:
T:$ tag 1 /tTodo
-------------------------------------------------------------
Got it! I've tagged this as:
 [o] Read book (by: Oct 19 2020 06.00PM)(tag: Todo)
-------------------------------------------------------------
3.4.4. Listing tasks: list
Use the list command to list the tasks you have added to Zer0Note. There are 4 ways you can use this
command, described below:
3.4.4.1. Listing all tasks
When you want to have a look at your task list, you can list out all the existing tasks.
Format: list
Example of usage:
T:$ list
-------------------------------------------------------------
1:[o] Read book (by: Oct 19 2020 06.00 PM)(tag: Todo)
2:[x] Return book (by: Oct 23 2020 12.00 PM)
3:[x] Submit assignment (by: Oct 18 2020 04.00 PM)
4:[x] CS2113T Quiz (by: Oct 23 2020 11.00 PM)
5:[o] CS2101 OP2 (by: Oct 25 2020 11.00 AM)
-------------------------------------------------------------
3.4.4.2. Listing done tasks
When you want to keep track of your progress, you can list out all the tasks that are marked as done.
Format: list /d
Example of usage:
T:$ list /d
-------------------------------------------------------------
1:[o] Read book (by: Oct 19 2020 06.00 PM)(tag: Todo)
2:[o] CS2101 OP2 (by: Oct 25 2020 11.00 AM)
-------------------------------------------------------------
3.4.4.3. Listing undone tasks
If you want to have a look at what you need to do, you can list out all the tasks that are not marked as done.
Format: list /u
Example of usage:
T:$ list /u
-------------------------------------------------------------
1:[x] Return book (by: Oct 23 2020 12.00 PM)
2:[x] Submit assignment (by: Oct 18 2020 04.00 PM)
3:[x] CS2113T Quiz (by: Oct 23 2020 11.00 PM)
-------------------------------------------------------------
3.4.4.4. Listing urgent tasks
If you’re in a time crunch, you can list out top urgent tasks that have not been done, sorted by deadlines. If there are many undone tasks, only the top three urgent ones will be displayed.
Format: list /urgent
Example of usage:
T:$ list /urgent
-------------------------------------------------------------
1:[x] Submit assignment (by: Oct 18 2020 04.00 PM)
2:[x] CS2113T Quiz (by: Oct 23 2020 11.00 PM)
3:[x] Return book (by: Oct 23 2020 12.00 PM)
-------------------------------------------------------------
3.4.5. Finding tasks find
Your tasklist has grown, and it becomes a pain to go through every single task in the list. Filtering the list by completion and deadline does not provide the intended result either. Don’t worry! You can search for any task directly too.
There are two ways to find a task:
3.4.5.1. Finding by keyword
Finds any task that contains the keyword in the task description. The search is not case-sensitive.
Format: find [KEYWORD]
These are the parameters required in the command:
-
KEYWORD: keyword to look for
Example of usage:
T:$ find book
-------------------------------------------------------------
1:[o] Read book (by: Oct 19 2020 06.00 PM)(tag: Todo)
2:[x] Return book (by: Oct 23 2020 12.00 PM)
-------------------------------------------------------------
3.4.5.2. Finding by tag
Finds any task that has a specified tag. The search is not case-sensitive.
Format: find /t[TAG]
These are the parameters required in the command:
-
TAG: tag to look for
Example of usage:
T:$ find /tTodo
-------------------------------------------------------------
Here are the tasks I found:
1:[o] Read book (by: Oct 19 2020 06.00 PM)(tag: Todo)
-------------------------------------------------------------
3.4.6. Deleting a task: delete
Use the delete command to delete tasks you previously added to Zer0Note.
Format: delete [INDEX]
This is the parameter required in the command:
-
INDEX: index number of the intended task in the full task list
Example of usage:
T:$ delete 1
-------------------------------------------------------------
Noted. I've removed this task:
[x] Read book (by: Oct 19 2020 06.00 PM)
	Now you have 4 tasks in the list.
-------------------------------------------------------------
3.5. Notebook Mode
In a semester, an average student takes about 4-5 modules. You can use Zer0Note to keep all your notes and thoughts about all those different classes in one place. This can help you organise your thoughts better!
In Notebook Mode, you can manage a shelf of notebooks.
You can name it however you like and create as many notebooks you wish!
Each notebook contains sections, and each section contains pages. Each page holds your type-written notes.
For example, you can keep one notebook for each module you take, one section for each week or lecture, and pages for different concepts.
3.5.1. Adding a notebook/section/page: add
Within Notebook Mode, you can add a notebook, section or a page. This section will guide you through these commands.
add /nSchool /sAdmin /p1: Moduleswill throw an error.
3.5.1.1. Adding a notebook
Use the add /n command to add a notebook into the notebook shelf.
Format: add /n[NOTEBOOK]
This is the parameter required in the command:
-
NOTEBOOK: the name of the notebook.
Example of usage:
Let’s say you want to take notes for CS2113T, a module you’re currently taking.
N:$ add /nCS2113T
-------------------------------------------------------------
Added notebook with title: CS2113T
-------------------------------------------------------------
Now that you have added a new notebook for CS2113T, you can add a section!
3.5.1.2. Adding a section
Use the add /s command to add a section into the selected notebook.
notebookbefore adding a section!
Format: add /s[SECTION]
This is the parameter required in the command:
-
SECTION: the name of the section in the selectednotebook.
Example of usage:
Now that you have a notebook for CS2113T, you can make a section for each academic week.
CS2113Tnotebook first!
N/CS2113T:$ add /sW1: Java
-------------------------------------------------------------
Added section with title: W1: Java
-------------------------------------------------------------
Great! You can now add a page (or as many pages as you like) into your new section titled W1: Java.
3.5.1.3. Adding a page
Use the add /p command to add a page into the selected section.
sectionbefore adding a page!
Format: add /p[PAGE]; [PAGE CONTENT]
These are the parameters required in the command:
-
PAGE: the name of the page in the selectedsection. -
PAGE CONTENT: the contents that you would like to store in thepage.
Example of usage:
Let’s say you want to add a page into a selected notebook section.
W1: Javasection!
N/CS2113T/W1: Java:$ add /pHELLO WORLD; System.out.println("Hello World!");
-------------------------------------------------------------
Added page with title: HELLO WORLD
-------------------------------------------------------------
You’ve successfully added a new page into the section W1: Java of the notebook CS2113T.
3.5.2. Selecting a notebook/section/page: select
After adding a notebook, section or page, you may want to view its contents.
Use the select command to select a notebook, section, page or a combination of the three.
addasection, you must select anotebookfirst.
addapage, you must select asectionfirst.
Format: select /n[NOTEBOOK] /s[SECTION] /p[PAGE]
These are the parameters required in the command:
-
NOTEBOOK: the title of the expectednotebook. -
SECTION: the title of the expectedsectioninnotebook. -
PAGE: the page title in the expectedsection.
In NOTEBOOK MODE:
-
select /nCS2113T /sW1: Java /pHELLO WORLD- selects the page titledHELLO WORLDin the notebookCS2113t, under the sectionW1: Java. -
select /nCS2113T /sW1: Java- selects the section titledW1: Javain the notebookCS2113T. -
select /nCS2113T- selects the notebook titledCS2113T. -
select /all- navigates back intoNOTEBOOK MODE, where you can list to see all available notebooks. These commands can be run anywhere(i.e in a selected notebook or section) once you’re in NOTEBOOK MODE.
In a selected NOTEBOOK:
-
select /sW1: Java /pHELLO WORLD- selects the page titledHELLO WORLD, in the sectionW1: Javaof the selected notebook. -
select /sW1: Java- selects the section entitledW1: Javain the selected notebook.
In a selected SECTION:
-
select /pHELLO WORLD- selects the page titledHELLO WORLDin the selected section.
listto ensure that you’re typing in the correct parameters.
Example of usage:
If you have a notebook entitled CS2101, you can select it by typing select /nCS2101.
N:$ select /nCS2101
-------------------------------------------------------------
now in notebook book: CS2101
-------------------------------------------------------------
3.5.3. Tagging a notebook/section/page: tag
You have now several notebooks in the bookshelf. Some come from the same module, while others are just a running list of inspirations you have.
This command lets you add a single tag to a selected notebook, section or tag to remind you of the category it
belongs to. You can learn how to search for all notebooks, sections and pages in the bookshelf with the same tag in
Finding by tag.
Format: tag /t[TAG]
These are the parameters required in the command:
-
TAG: text description of the tag
Example of usage: For example, you would to add a tag “Module” to a notebook titled “CS2101”:
N/CS2101:$ tag /tModule
-------------------------------------------------------------
Got it! I've tagged this as:
CS2101 (tag: Module)
-------------------------------------------------------------
3.5.4. Listing contents: list
Use the list command to view the content of the bookshelf, a selected book or a selected section.
Format: list (/s) (/a)
-
listdisplay contents in one level below the current selected object -
list /sdisplay the notebooks together with titles of sections in NOTEBOOK mode -
list /adisplay all notebooks, sections and pages.
In NOTEBOOK MODE,
-
listdisplays the titles of notebooks in the shelf. -
list /sdisplays the titles of notebooks together with titles of sections. -
list /adisplays all notebooks, sections and pages.
Examples of usage:
N:$ list
-------------------------------------------------------------
* CS2113T
* CG2271
* CS2101
-------------------------------------------------------------
N:$ list /s
-------------------------------------------------------------
* CS2113T
  |-- W1: Java
  |-- Chapter 1
  |-- Chapter 2
* CG2271
* CS2101
  |-- Chapter 1
  |-- Chapter 2
  |-- Chapter 3
-------------------------------------------------------------
N:$ list /a
-------------------------------------------------------------
* CS2113T
  |-- W1: Java
        |-- HELLO WORLD
            System.out.println("Hello World!");
  |-- Chapter 1
        |-- Definition
            What is OOP?
  |-- Chapter 2
* CG2271
* CS2101
  |-- Chapter 1
        |-- Writing email
            Lorem ipsum
        |-- Team meeting
            Lorem ipsum
  |-- Chapter 2
  |-- Chapter 3
-------------------------------------------------------------
listfirst to see the titles only before, otherwise you could be overwhelmed with the details of all the notebooks
In a selected NOTEBOOK:
-
listdisplays the titles of all the sections in the selected notebook. -
list /adisplays all sections and pages in the selected notebook.
Examples of usage:
N/CS2101:$ list
-------------------------------------------------------------
* Chapter 1
* Chapter 2
* Chapter 3
-------------------------------------------------------------
N/CS2101:$ list /a
-------------------------------------------------------------
* Chapter 1
  |-- Writing email
        Lorem ipsum
  |-- Team meeting
        Lorem ipsum
* Chapter 2
* Chapter 3
-------------------------------------------------------------
In a selected SECTION:
-
listdisplays all the pages in the selected section.
Example of usage: Suppose you have selected a section “Chapter 1” in the notebook “CS2101”.
N/CS2101/Chapter 1:$ list
-------------------------------------------------------------
* Writing email
    Lorem ipsum
* Team meeting
    Lorem ipsum
-------------------------------------------------------------
3.5.5. Finding contents: find
Just like how you can find a task in the Timetable mode, you can look for contents in this mode. Even sections and pages that do not belong to a selected notebook can be found. There are two ways to do so:
3.5.5.1. Finding by keyword
If there is a particular keyword in the title of the various notebooks, sections and pages that you are looking for, this find by keyword feature will certainly help!
This feature finds all notebooks, sections and pages that contain the keyword in their title. The search is not case-sensitive.
Format: find [KEYWORD]
These are the parameters required in the command:
-
KEYWORD: keyword to look for
Example of usage:
N:$ find chapter
-------------------------------------------------------------
I've found these for keyword: chapter
Sections:
1. CS2113T |-- Chapter 1

2. CS2113T |-- Chapter 2

3. CS2101 |-- Chapter 1

4. CS2101 |-- Chapter 2

5. CS2101 |-- Chapter 3

-------------------------------------------------------------
|--indicates “belongs to”. You can use this to identify the particular notebook and section a page is in.
3.5.5.2. Finding by tag
Instead of finding a keyword from the title of the notebooks, sections and pages, you can search for specific keywords in your tags that you had included as well!
This feature finds all notebooks, sections and pages that has a specified tag. The search is case-sensitive.
Format: find /t[TAG]
These are the parameters required in the command:
-
TAG: tag to look for
Example of usage:
N:$ find /tmodule
-------------------------------------------------------------
I've found these for tag: module
Notebooks:
1. CS2101

-------------------------------------------------------------
3.5.6. Deleting a notebook/section/page: delete
Use the delete command to delete an existing notebook, section or page.
Format: delete /n[NOTEBOOK] /s[SECTION] /p[PAGE]
-
NOTEBOOK: the title of the notebook to be deleted -
SECTION: the title of the section to be deleted in the selectedNOTEBOOK -
PAGE: the title of the page to be deleted in the selectedSECTION.
In NOTEBOOK MODE,
-
delete /nCS2101 /sChapter 1 /pWriting emaildeletes pageWriting emailunder the sectionChapter 1of the notebookCS2101. -
delete /nCS2101 /sChapter 1deletes the entire section titledChapter 1in the notebookCS2101. -
delete /nCS2101deletes the entire notebook titledCS2101.
Example of usage:
N:$ delete /nCS2101 /sChapter 1 /pWriting email
-------------------------------------------------------------
Noted. I've removed this page: Writing email
Lorem ipsum
-------------------------------------------------------------
N:$ delete /nCS2101 /sChapter 1
-------------------------------------------------------------
Noted. I've removed this section:
	Chapter 1
-------------------------------------------------------------
In a selected NOTEBOOK,
-
delete /sW1: Java /pHELLO WORLDdeletes pageHELLO WORLDof the section titledW1: Javaof the selected notebook. -
delete /sW1: Javadeletes the section titledW1: Javaof the selected notebook.
Example of usage:
In the notebook CS2113T:
N/CS2113T:$ delete /sW1: Java /pHELLO WORLD
-------------------------------------------------------------
Noted. I've removed this page: HELLO WORLD
System.out.println("Hello World!");
-------------------------------------------------------------
N/CS2113T:$ delete /sW1: Java
-------------------------------------------------------------
Noted. I've removed this section:
	W1: Java
-------------------------------------------------------------
In a selected SECTION,
-
delete /p1deletes page1of the selected section.
Example of usage:
In the section Chapter 1 of notebook CS2113T:
N/CS2113T/Chapter 1:$ delete /pDefinition
-------------------------------------------------------------
Noted. I've removed this page: Definition
What is OOP?
-------------------------------------------------------------
3.6. Exiting the program: exit
To close the program, type exit.
4. FAQ
This section answers some frequently asked questions.
How do I transfer my data to another computer?
The save files for Zer0Note are stored in the same directory as the Zer0Note JAR file. You may move the entire directory to another computer and Zer0Note will continue to work with your saved data. Alternatively, you may just move the ‘tasks.txt’, ‘notebooks.txt’ and ‘nameOfUser.txt’ files in the Zer0Note JAR file directory to another computer, into the directory containing the Zer0Note JAR file on that computer.
Where do I find the release?
You can find it here.
I found a bug! Where do I report it?
Oh no! We tried to make Zer0Note as bug-free as possible, but sadly, we may have missed some. Please add an issue to our issue tracker on GitHub over here, and we will attempt to fix it as soon as possible.
I have a feature idea for Zer0Note! Can I suggest it to the developers?
Thank you for using Zer0Note, we’re glad you have a feature idea! Please submit it to our issue tracker as well. While we cannot guarantee that we will implement your suggestion (sorry!) we will read all suggestions and consider them for future updates.
How does Zer0Note work under the hood?
We’re delighted that you’re curious about how Zer0Note works! Our code is fully open-source and can be accessed on our GitHub repository. We recommend you read our Developer Guide to better understand the code, especially if you want to contribute to development.
5. Command Summary
This section lists all the commands available in Zer0Note! There are general commands that can be used anywhere, as well as commands that are specific to the mode you are in!
General Commands
The following table shows you a list of commands that can be used anywhere, and in any mode.
Table 2: Commands that can be used anywhere
| Command | Format | Example |
|---|---|---|
Help: help
|
1) help 2) help timetable 3) help notebook | |
Exit exit
|
exit |
Timetable Mode
The following table is a cheatsheet of the commands available in Timetable Mode.
Table 3: Cheatsheet of the commands available in Timetable Mode
| Command | Format | Example |
|---|---|---|
Add a task: add
|
add /t[TASK] /by[dd-MM-yyyy] [hhmm] | add /tcoding /by19-10-2020 1705 |
Mark a task as done: done
|
done [INDEX] | done 1 |
Tag a task: tag
|
tag [INDEX] /t[TAG] | tag 1 /tCS2113T |
List tasks: list
|
list (/u) (/d) (/urgent) | |
Finding tasks: find
|
1) find [KEYWORD] 2) find /t[TAG] | 1) find book 2) find /tTodo |
Delete a task: delete
|
delete [INDEX] | delete 1 |
Switch to notebook mode: mode
|
mode /n |
Notebook Mode
The following table is a cheatsheet of the commands available in Notebook Mode.
Table 4: Cheatsheet of the commands available in Notebook Mode
| Command | Format | Example |
|---|---|---|
Add: add
|
1) add /n[NOTEBOOK] 2) add /s[SECTION] 3) add /p[PAGE]; [CONTENT] | add /nCS2101 |
Select: select
|
1) select /n[NOTEBOOK] 2) select /s[SECTION] 3) select /p[NUMBER] | select /nCS2101 |
Tag: tag
|
tag /t[TAG] | tag /tCS2113T |
List contents: list
|
list (/s) (/a) | |
Find: find
|
1) find [KEYWORD] 2) find /t[TAG] | 1) find chapter 2) find /tModule |
Delete: delete
|
1) delete /n[NOTEBOOK] /s[SECTION] /p[NUMBER] | select /nCS2113T /sW10 /p1 |
Switch to timetable mode: mode
|
mode /t |
6. For advanced users: Editing your save file
Zer0Note saves your tasks as a plain text file, in a format designed to be easy to read, understand and modify if you so desire. We realise that power users may wish to use a different text editor such as vim or Visual Studio Code to edit their notes, while also taking advantage of the organisation features of Zer0Note. If you wish to edit the save file by yourself, here’s a detailed guide on the contents of the save file and how to edit it.
The save files are stored in the same directory as the Zer0Note JAR file.
6.1. The tasks save file
The tasks save file is formatted as follows.
First, one line containing only a number indicating the number of tasks in the list.
Then, we have each of your tasks, stored as 3 lines each.
The first line contains the title of the task.
The second line contains the due date and time of the task, formatted as DD-MM-YYYY HHMM.
The third line contains true or false, indicating if the task has been marked as done. (true means it has been
marked as done, false means it has not)
Here is an example of the contents of a tasks save file:
3
Code for CS2113T Team Project
10-11-2020 1200
false
Read about hydrogen fuel cells
22-11-2020 1234
true
Read Book
19-10-2020 1800
false
tasks.txtsave file should look.
The first line indicates that you have 3 tasks saved.
Then, 3 tasks, titled “Code for CS2113T Team Project”, “Read about hydrogen fuel cells” and “Read Book” respectively , are stored as described above. For example, the first task, titled “Code for CS2113T Team Project” is due on the 10th of November 2020, at 12 noon. It has not been marked as done.
6.2. The notebooks save file
Here is how the notebooks save file looks.
6.2.1. Pages
A page is saved as two consecutive lines of text. The first line is the title of the notebook, while the second line is the content.
For example, a page might be represented like this:
What is Java?
Java is a programming language used by 3 billion devices.
The first line, that says “What is Java”, is the title of the page, while the second line is the content of that page.
6.2.2. Sections
The first line of a section contains the title of the section.
The second line of a section contains just a number. This number indicates the number of pages in the section.
Then, all the pages of the section are represented as described in 6.2.1. Pages.
For example, a section might be represented like this:
Java
2
What is Java?
Java is a programming language used by 3 billion devices.
Why Java?
It's highly portable and relatively fast.
The first line, “Java”, is the title of the section.
The second line indicates that the section has 2 pages.
Then, you have 2 pages, titled “What is Java” and “Why Java” respectively. They are represented as described in 6.2.1. Pages.
6.2.3. Notebooks
The first line of a notebook contains the title of the notebook.
The second line of a notebook contains just a number. This number indicates the number of sections in the notebook.
Then, all the sections of the notebook are represented as described in 6.2.2. Sections.
For example, a saved notebook might look like this:
CS2113T
4
Java
2
What is Java?
Java is a programming language used by 3 billion devices.
Why Java?
It's highly portable and relatively fast.
OOP
1
What is OOP?
OOP is Object Oriented Programming.
UML
2
What is UML?
UML is Unified Modeling Language.
Why UML?
UML is used to draw diagrams to explain your code to noobs.
Assertions
1
Why assertions?
Honestly I don't know.
The first line, “CS2113T”, is the title of the notebook.
The second line indicates that the notebook has 4 sections.
Then, you have 4 sections, titled “Java”, “OOP”, “UML” and “Assertions” respectively. They are represented as described in 6.2.2. Sections.
6.2.4. The Notebook Shelf
The notebook shelf is what is stored in the save file. It represents all your notebooks, sections, and pages at once. It is formatted as follows.
The first line contains just a number. This number indicates the number of notebooks in your Notebook Shelf.
Then, all the notebooks on your Notebook Shelf are represented as described in 6.2.3. Notebooks.
For example, a saved notebook shelf might look like this:

notebooks.txtsave file should look.
The first line indicates that you have 2 notebooks saved in the Notebook Shelf.
Then, you have 2 notebooks, titled “CS2113T” and “CS2101” respectively. They are represented as described in 6.2.3. Notebooks.
Notebook “CS2113T” contains 4 sections, titled “Java”, “OOP”, “UML” and “Assertions” respectively. The sections are stored as described in 6.2.2. Sections.
Section “Java” contains 2 pages, titled “What is Java?” and “Why Java?” respectively. The pages are stored as described in 6.2.1. Pages.